
Insulating & Capping Your Tiny House Trailer
So you’ve just got your hands on your brand new tiny house trailer and you’re ready to get into building your new dream tiny home. Where do you start and what do you do first? In this article I’m going to run you through the very first steps you need to take on your tiny house trailer to ensure it is both well insulated and weather proof from the harshest of weather. Insulating and capping your trailer is a relatively easy job and one that the average person can complete quite easily over 1 weekend.
There are many reasons why we may choose to downsize our lives to live in a tiny house but one of the big ones for a lot of people is environmental sustainability and becoming more efficient with the resources you use such as electricity, water and potentially gas. One of the ways to effortlessly achieve greater sustainability and energy efficiency in your tiny home is to insulate the floor space. Here at Tiny Real Estate our custom Tiny House Trailers are designed with a floor space that is perfect for insulating and capping. If you are ordering your trailer elsewhere make this a priority in your design if you want to have a home that is very energy efficient and a home where you can walk around bare feet all year round because your floors are super insulated.
Your first step is to calculate how much materials you will need for the job. There are 4 materials you will need to insulate & cap your Tiny House Trailer:
- Insulation Batts
- Plywood or Chipboard
- Metal self tapping screws (to fix the sheets to the trailer)
- Adhesive Sealant
If your trailer is 7.2 metres x 2.4 metres then your calculations would go as follows:
Insulation m2 required = 7.2 x 2.4
= 17.28 m2
Now we need to calculate the number of sheets of Plywood or Chipboard:
We need to divide the length of our trailer by the width of 1 sheet of plywood/chipboard to get the number of sheets needed when stacked sideways.
Sheets required = 7.2 / 1.2 (this is the width of one sheet of plywood)
= 6 sheets
So after two quick sums we now know we need the following materials:
- 18 square metres of insulation batts
- 6 sheets of plywood/chipboard
- Metal self-tapping screws to screw your sheets down to the steel frame of the trailer. To calculate the length of the screw needed simply take your sheet thickness and add about 20mm. It’s most likely going to be around 40mm.
Here are the tools you will need to insulate and cap your Tiny House Trailer:
- Circular Saw
- Tape measure
- Pen/pencil
- Drill/driver
- Drill bit (to suit the self-tapping screws you buy)
- Sharp kitchen knife
- Gloves
- Respirator
- Caulking gun
- Clamps (to hold down sheets in place)
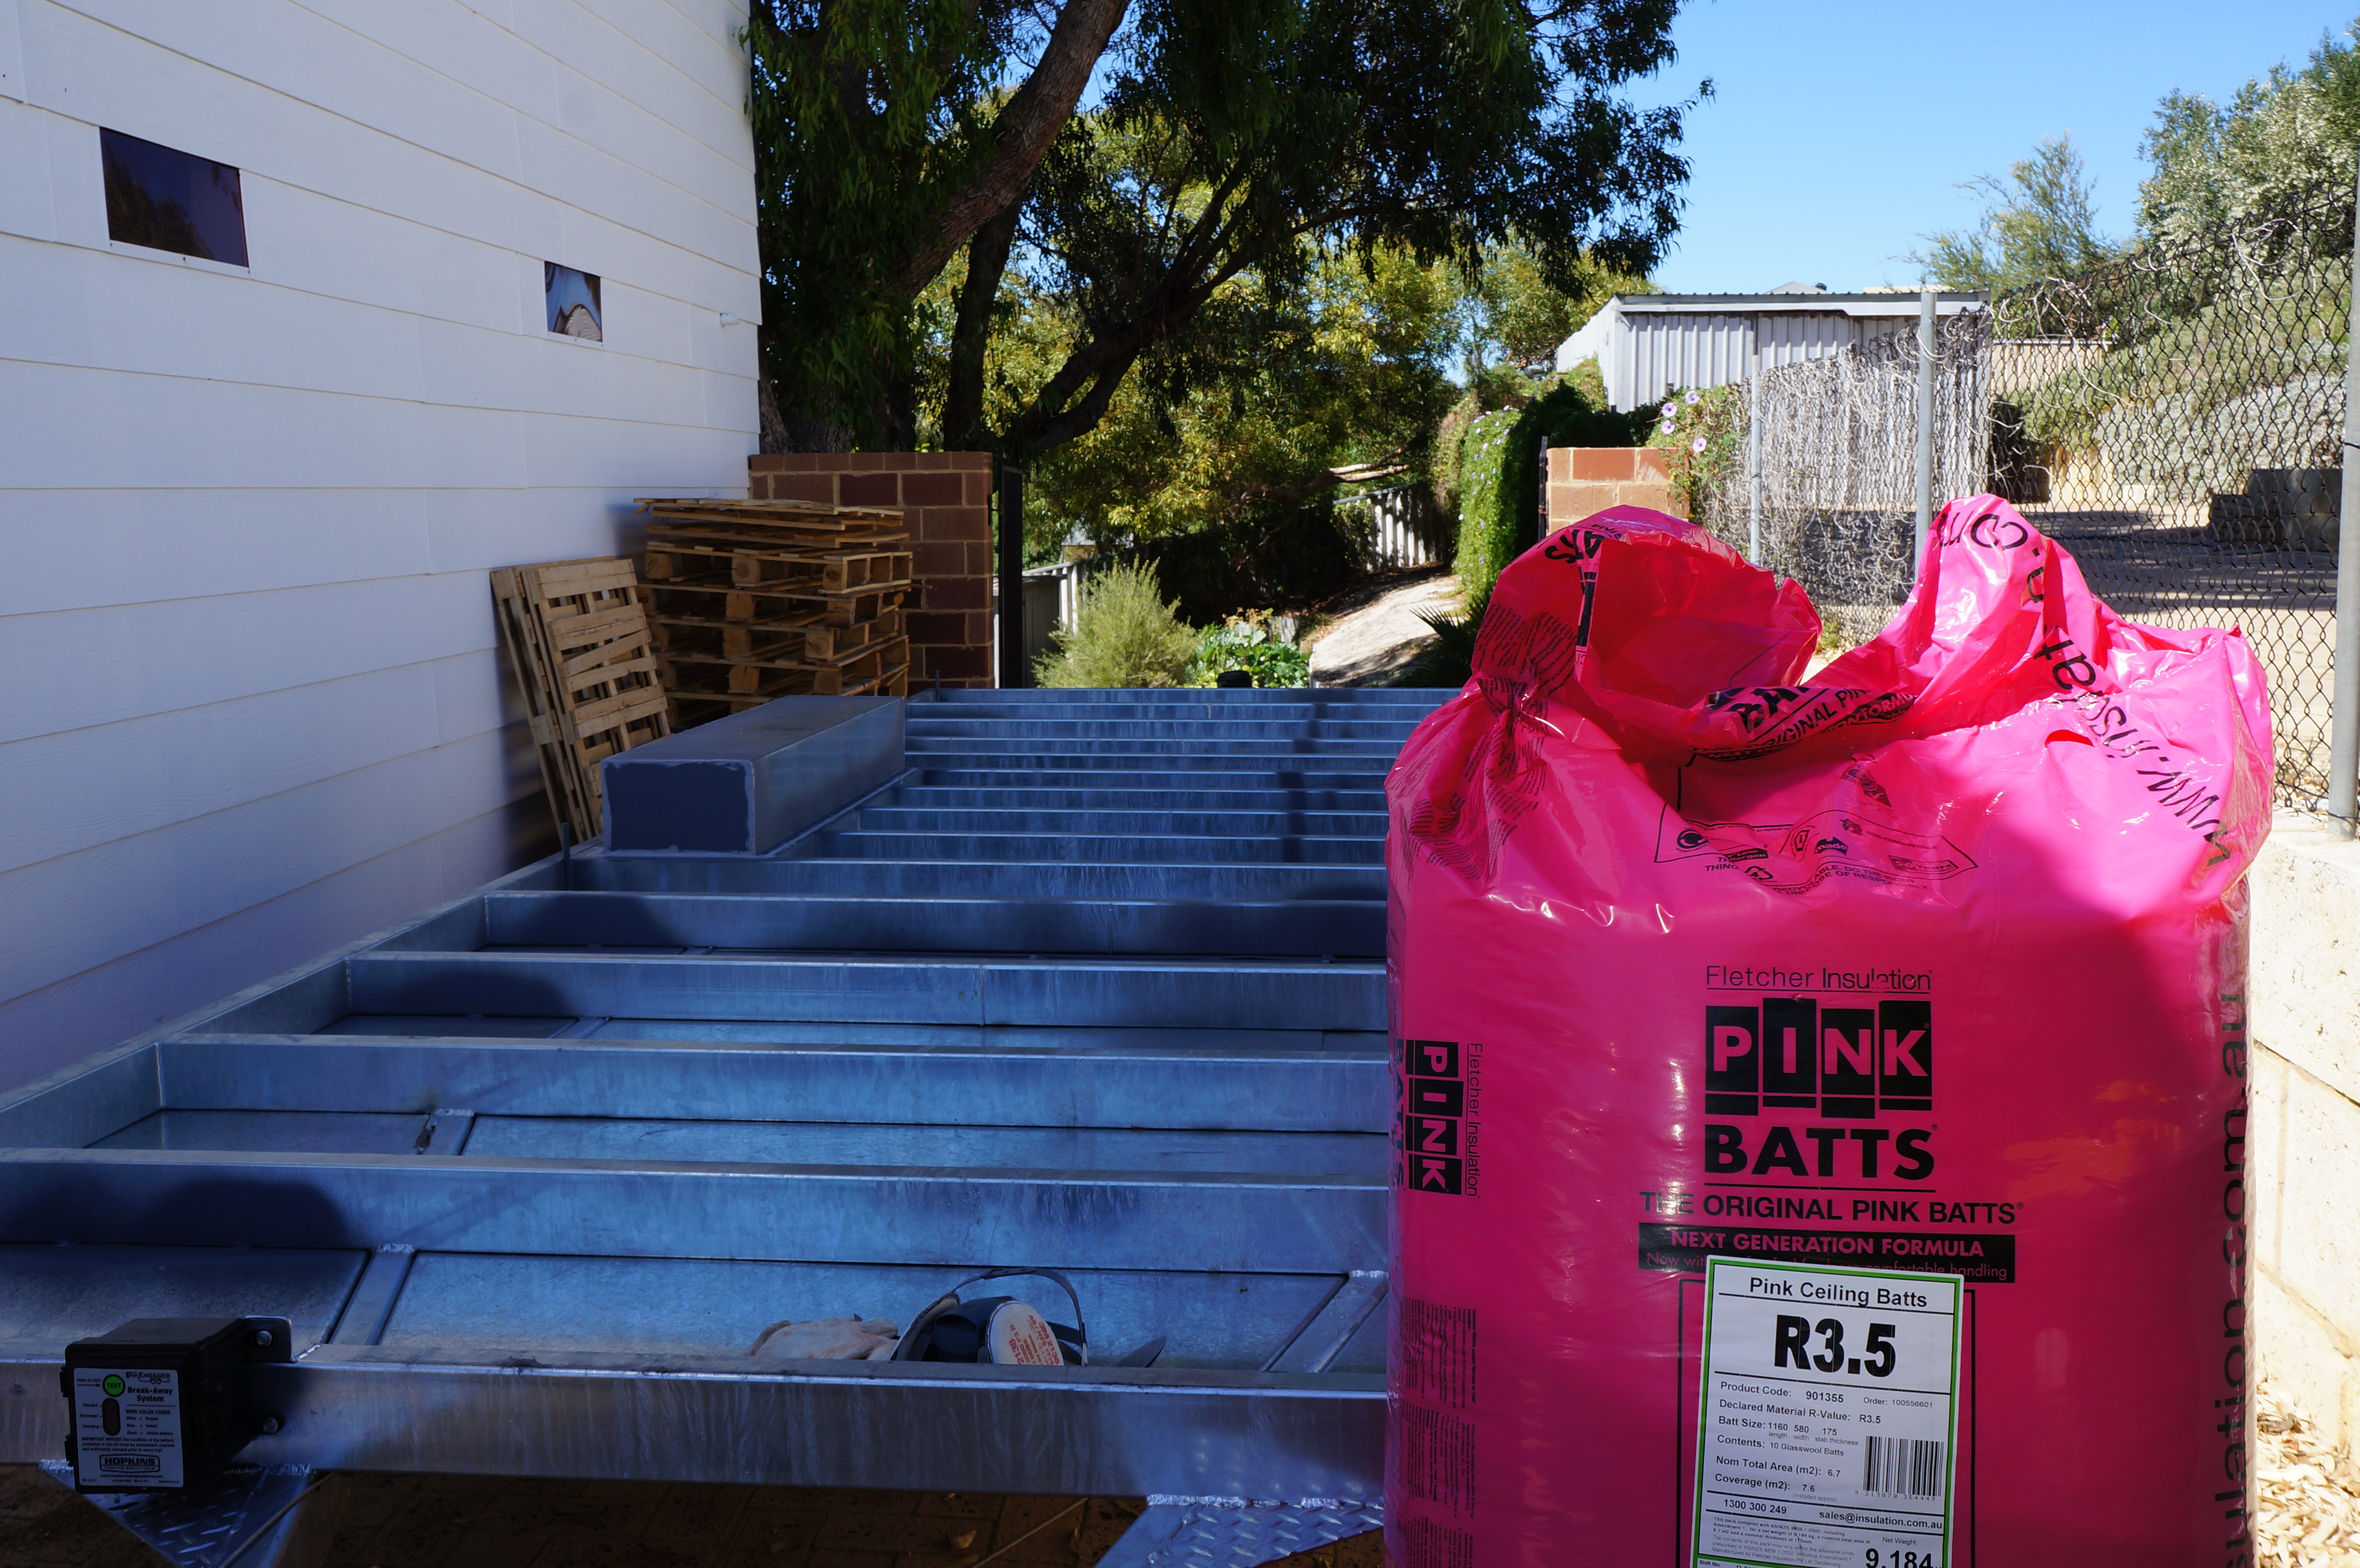
A little note on insulation batts. Depending on your trailer frame spacings you may need 450mm wide or 600mm wide batts. Measure your trailer cross member spacings to determine which one will suit your needs better. It just saves a lot of cutting and fiddling around if you have the right size.
Now you’re ready to go shopping, but how much do you need to budget for to complete this step? Depending on whether you buy all of your materials new from bunnings or use some recycled will effect the overall cost a lot. So to will the tools needed to complete the job. Assuming you already have all of the tools and you are going to buy all of the materials new you will be looking at about $500 to complete the job.
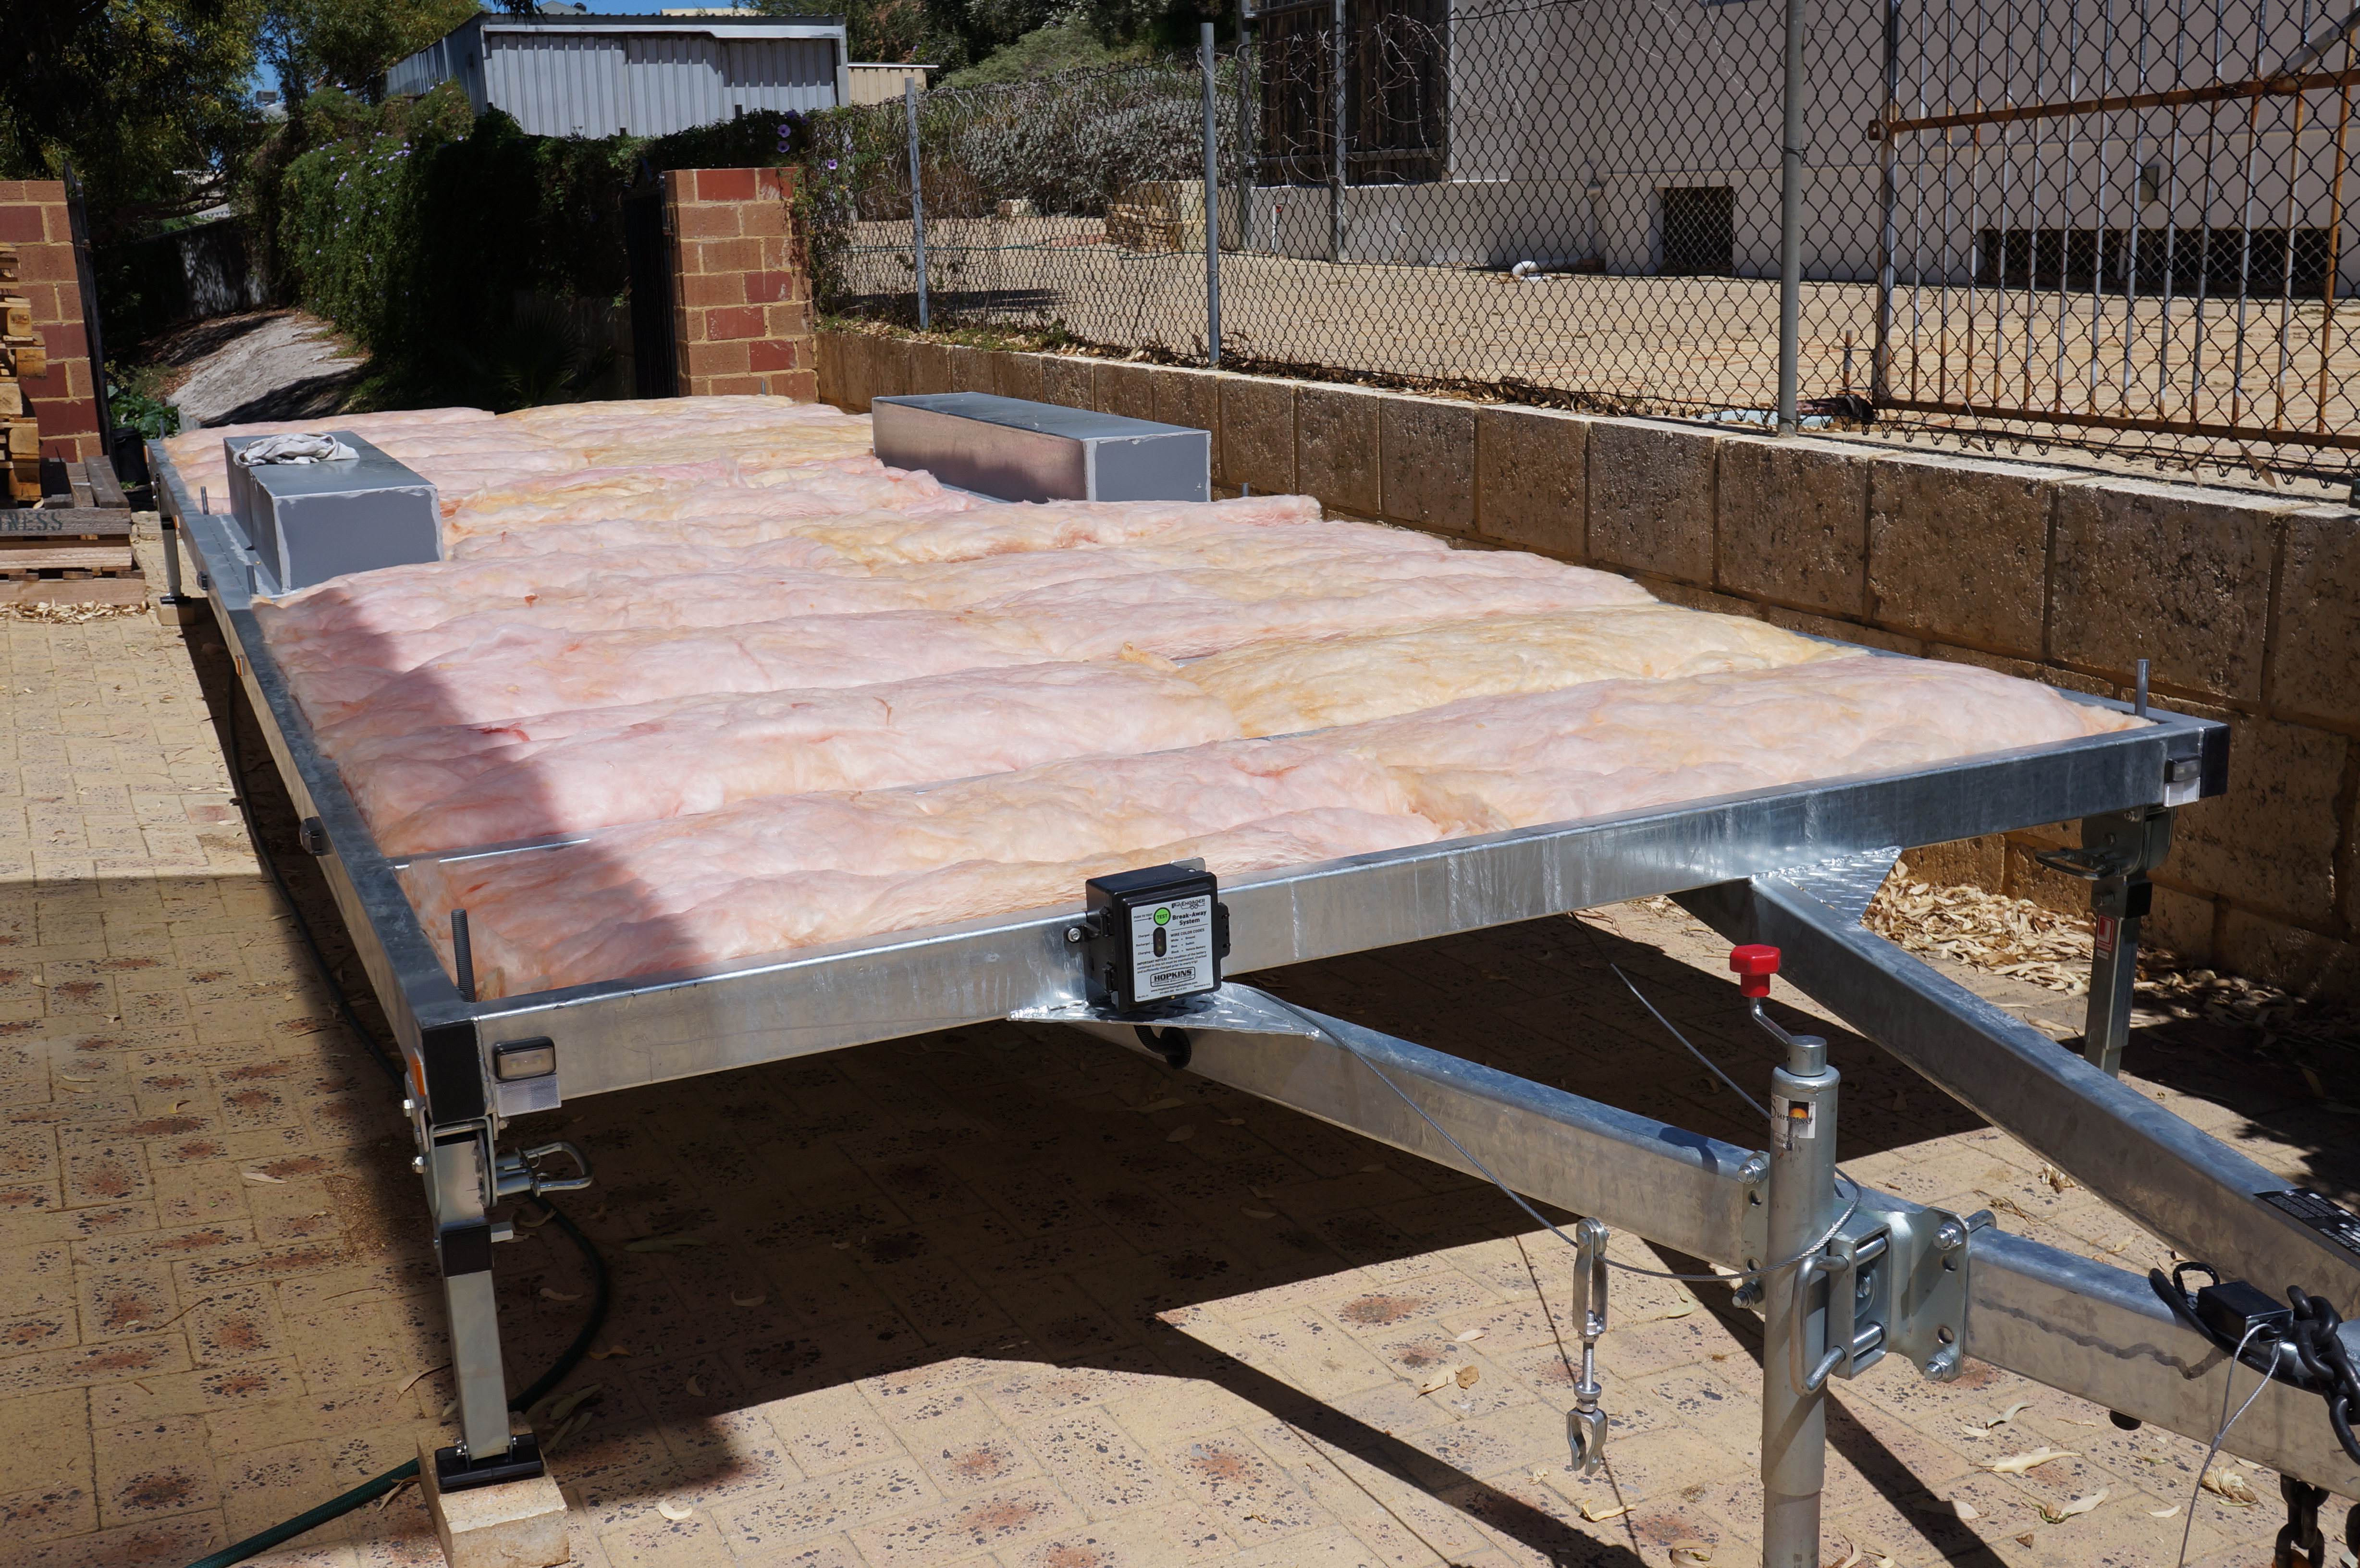
Our insulation ready to be installed
Once you have your materials ready to go it’s time to start placing your batts inside the spacings of your trailer. You simply just lay them in there and give them a gentle pat. Try not to compress them too much as this reduces their insulating performance. If you have wheel aches protruding through the deck then you will have to make some cuts at some point. The best way to do this is with a sharp, long kitchen knife. Refer to the Insulating and Capping Your Trailer video below to see this in action!
Once all of the spacings are filled with insulation you are then ready to start capping of across the top with your newly purchased sheets of Plywood or Chipboard. If your trailer is manufactured to exactly 2400mm wide and so to are you sheets then installation for you is going to be a piece of cake! More often than not though sheets come in measurements of 2440 x 1220mm so you will need to trim off the 40mm across the width and possibly 20mm of the length depending on where your cross members sit. As you lay your sheets you want to make sure that where two sheets join that they join on a cross member. This gives them a lot more added
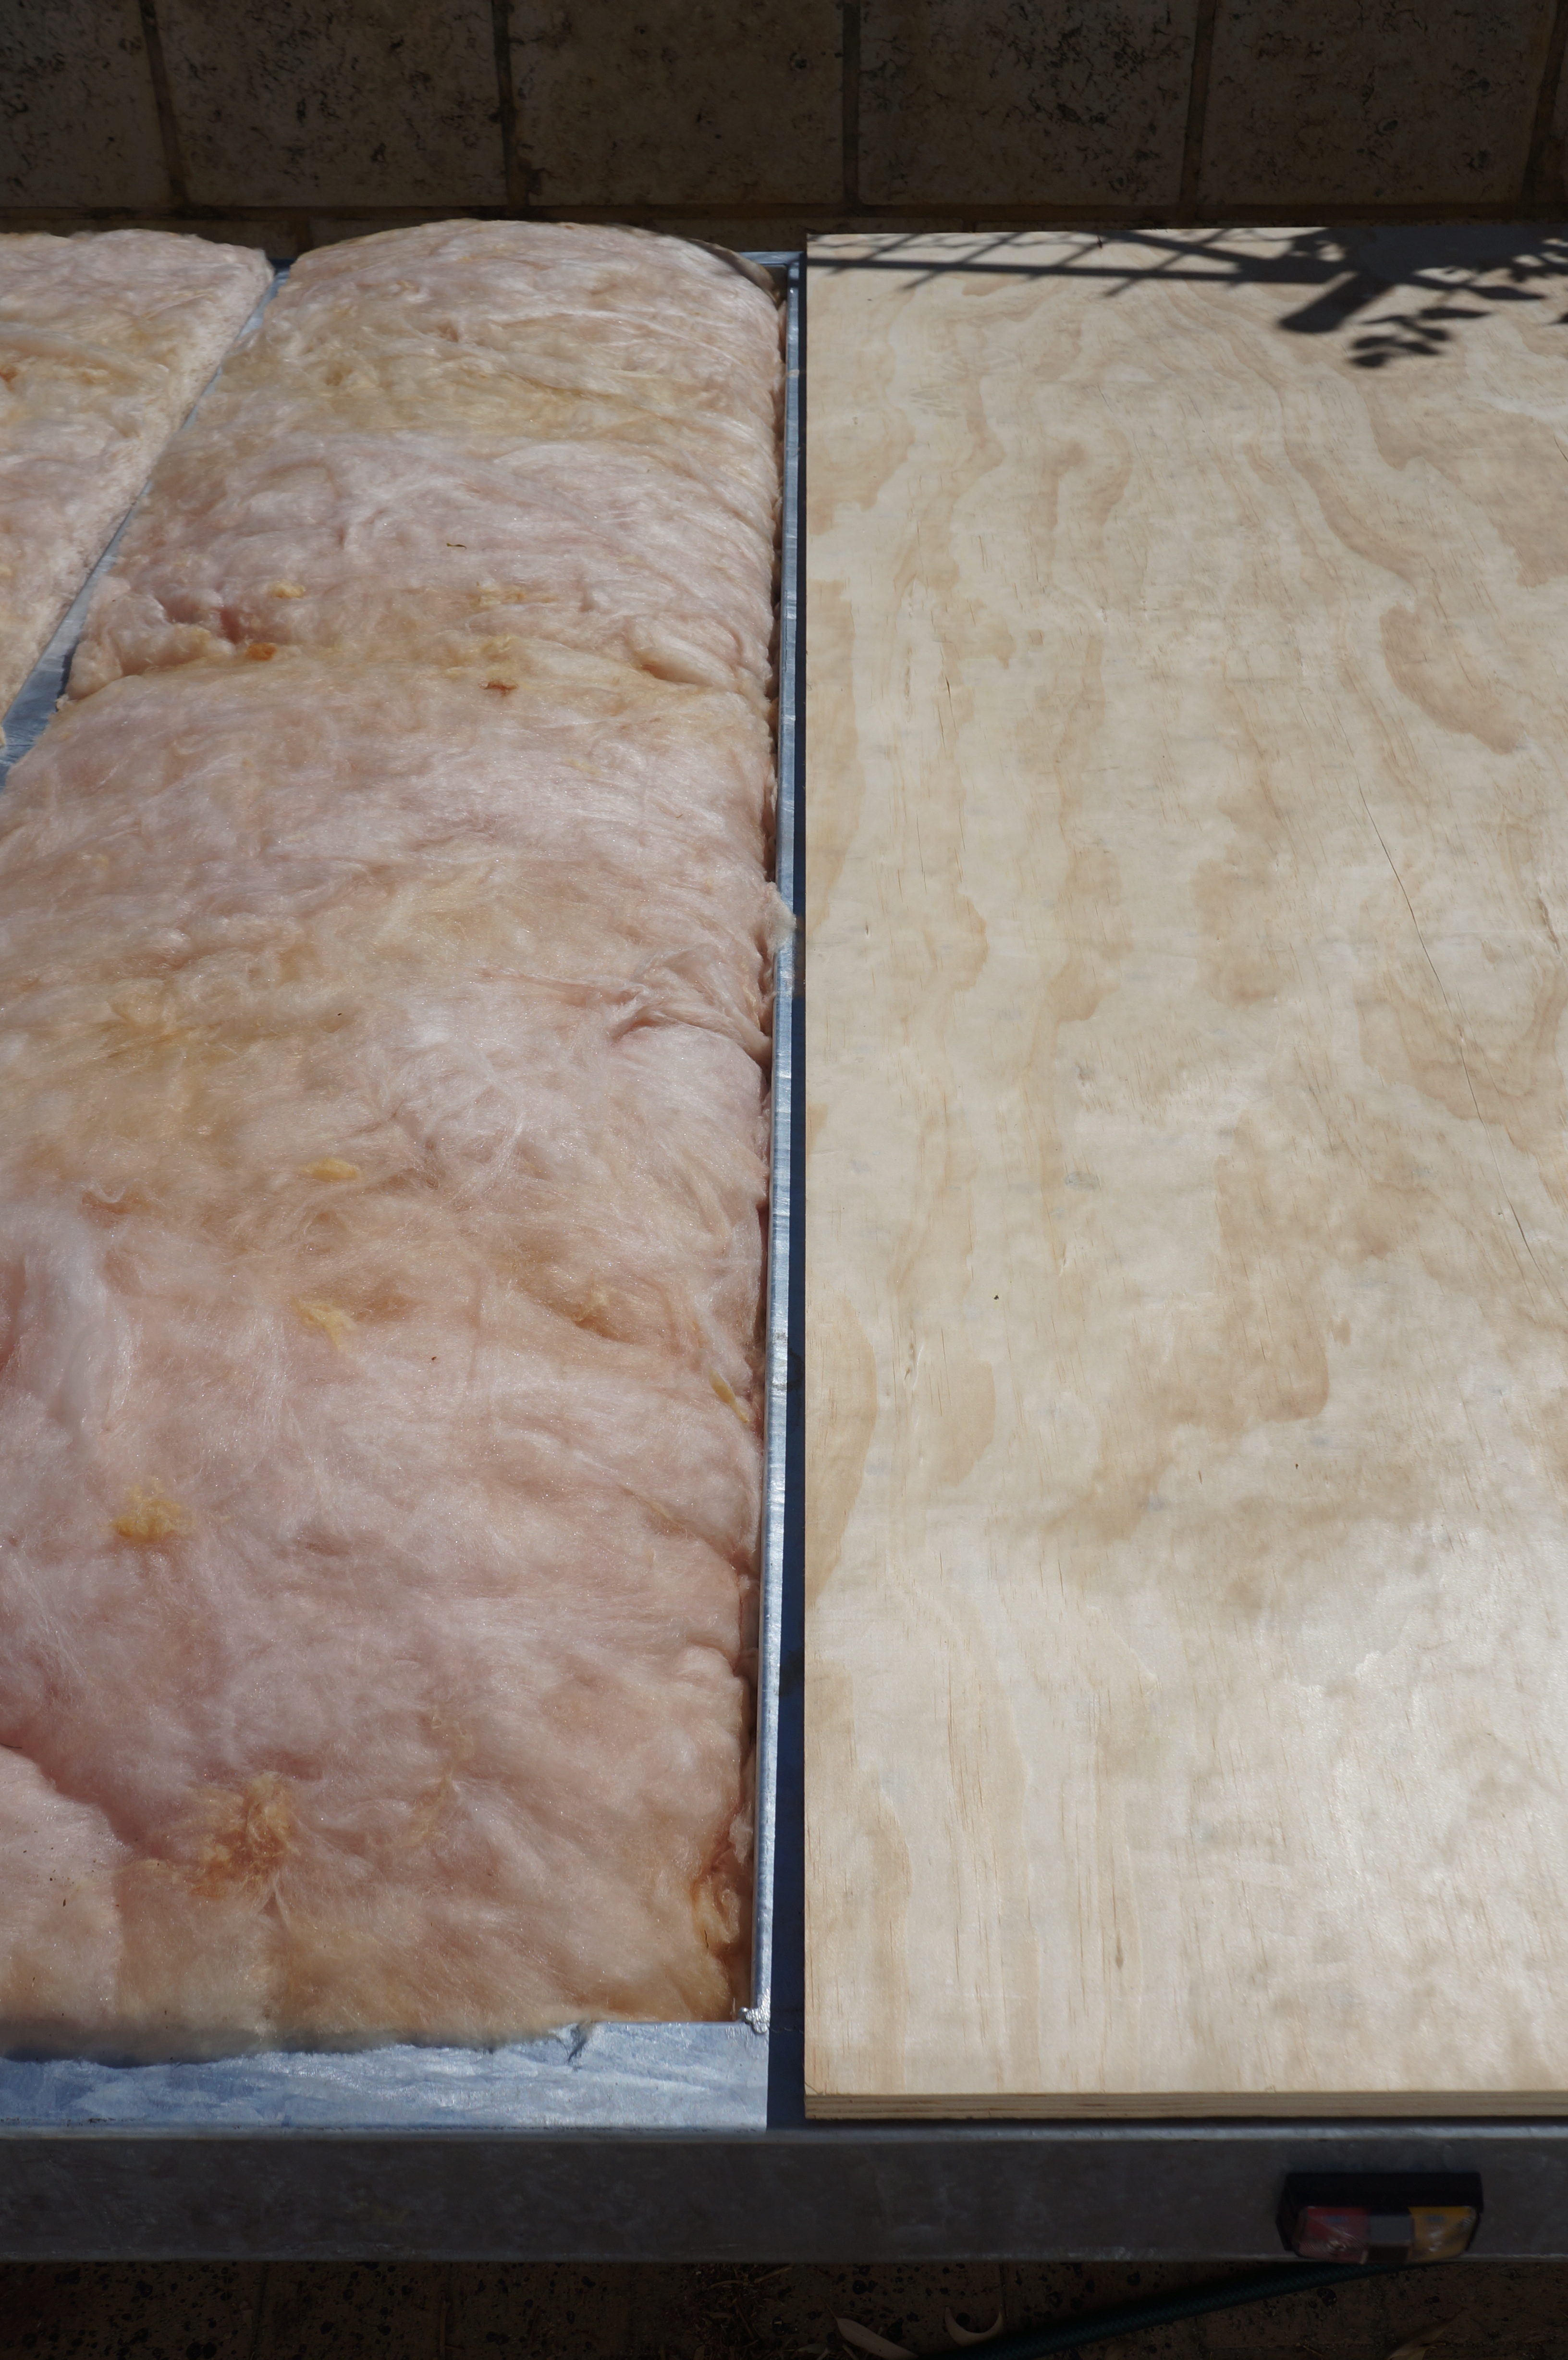
Capping using 17mm structural plywood
support. This is particularly important if you are using standard plywood or chipboard as the edges have no support if they are not sitting on something. A great option to avoid the headache of getting each sheet to land on a cross member (especially if your members are small and it’s hard to fit two edges on the one) is to use tongue and groove chipboard or plywood. As this interlocks with the tongue and groove it has a lot more strength when it is unsupported from underneath. If you do go for the tongue and groove option just make sure to go with the thickest material size for added strength (usually about 25mm thick).
After your first sheet is down and before installing the second sheet apply a bead of adhesive sealant to the join where the second sheet will but up to regardless of whether you are using tongue and groove or just standard sheets. This will not only give added strength to the join but will insulate your home better and ensure that there are no creaky floors.
Repeat the process above for the remaining sheets. If you have wheel arches protruding through your trailer bed like most of us do then you will need to cut around these when you reach them. Just remember the old saying; “measure twice, cut once”!
You should now be feeling super proud and excited. Your tiny house build has officially begun and you have just completed the first step of building your very own tiny house! How did you go insulating & capping your trailer? Please leave a comment below and share your experience! I really hope you found this article useful. If so, please share it with your friends and spread the awesome message of the tiny house movement in Australia. Also, don’t forget to like Tiny Real Estate on Facebook and follow us on Instagram for more Tiny House goodness.
Jason
on said
Thanks, explained the process well!
Adam Simmonds
on said
Thanks Jason! I’m glad it was helpful. Thanks a lot for the feedback!