Sheathing & Strapping Your Tiny House Framing

Sheathing and strapping is probably a term you have heard mentioned before if you have been following the tiny house movement for some time. But don’t worry if you haven’t because in this article we are going to take a deep dive into what these two are all about and how you can best use them on your own tiny house build. Both sheathing and strapping of a timber tiny house frame are designed to increase the structural strength of the structure. This is particularly important in the case of a tiny house as it is subject to a lot more movement and additional forces such as wind and vibrations compared to a conventional house.
Sheathing & Bracing your tiny house is not a step that all tiny house builders take so it is not essential but in this article I’m going to talk about why we might want to think about it and how to do get the job done with some step by step instructions.
What Is Sheathing & Strapping?
Sheathing is a process whereby we apply sheets of structural timber such as plywood to the outside of the timber wall and roof framing to add an additional layer of strength and bracing and also to create an additional air and water barrier for increased insulation. Bracing on the other hand is where use galvanised steel strapping that we tension to create extra structural support.
Why Should I Sheath My Tiny House?
There are a couple of main reasons why you might want to consider sheathing your tiny house. Here’s a couple:
- It increases the structural integrity of the whole structure.
- It adds another layer of weather protection to your tiny house.
Why Should I Strap My Tiny House?
- It also increases the structural integrity of the whole structure.
- It is quick and easy and gives you the added peace of mind.
The structural integrity of your completed tiny house is of course a very important factor to consider as this may be your home for many years and the last thing we want after spending countless hours and a fair bit of cash is our beloved home falling apart. So it pays to make sure we invest the money upfront in the elements of our build which will result in a quality, long lasting product. Structural design is one of these.
The other point to consider is the additional layer of weather protection that you will receive by installing it. It will not only keep our more of the heat in summer but will also help to keep in the warmth in winter. Any added insulation is always a bonus down the track especially with Australia’s hot summers.
What Are The Down Sides To Sheathing & Strapping My Tiny House?
The only two down sides to sheathing your tiny house are the extra cost and the time it takes to install it all. In Australia it will cost you around $600 to sheath a 7.2 metre long tiny house if you use a product called OSB which stands for Orientated Strand Board. It is a man-made structural product which is only 6mm thick but very strong and perfectly suited to bracing applications. The other option is to use 6mm structural plywood which works out a little more expensive.
The down sides to strapping your tiny house are very similar to sheathing but it does cost a lot less and takes a lot less time to install. When building our first tiny house prototype we chose to both strap and sheath to have the extra piece of mind that we had made our home as strong as it could possibly be out of timber. I feel the extra cost was worth it as our home has since towed fantastically and we have had no cracks appear on the inside on any of our walls or ceiling which was one of our major worries as we have beautiful smooth white walls! Not bad considering our home has already travelling over 300km so far.
How To Strap Your Tiny House
Strapping your tiny house is another layer of bracing which is really not essential but it is something that is often recommended by structural engineers in the case of tiny houses as it does provide extra support against all of the movement and forces that a tiny house is subject to.
To strap your tiny house you will first need to make sure that all of your framing is complete. If you are happy that everything is 100% complete then it is time to talk materials for the job. In order to carry out this job you will need a few things first. Before going and buying the items listed below have a good look at your drawings and calculate how much of each item you think you will need as the numbers below are purely a rough guide only.
Your shopping list should look something like this:
– The same nails or screws that were used to construct the framing
– A roll of galvanised strapping (available from most hardware stores) – approximately 100 metres for a 7.2 metre long tiny (this will give you enough for all of the walls and the roof)
– At least 20 tensioners (these come in packets with a few per pack)
– Tin snips
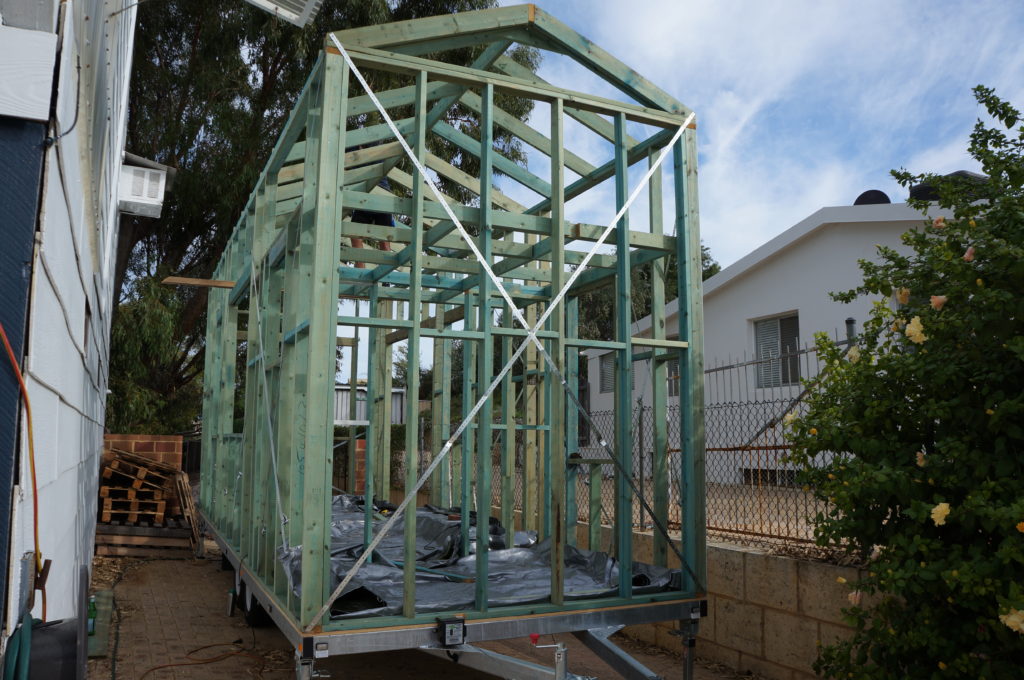
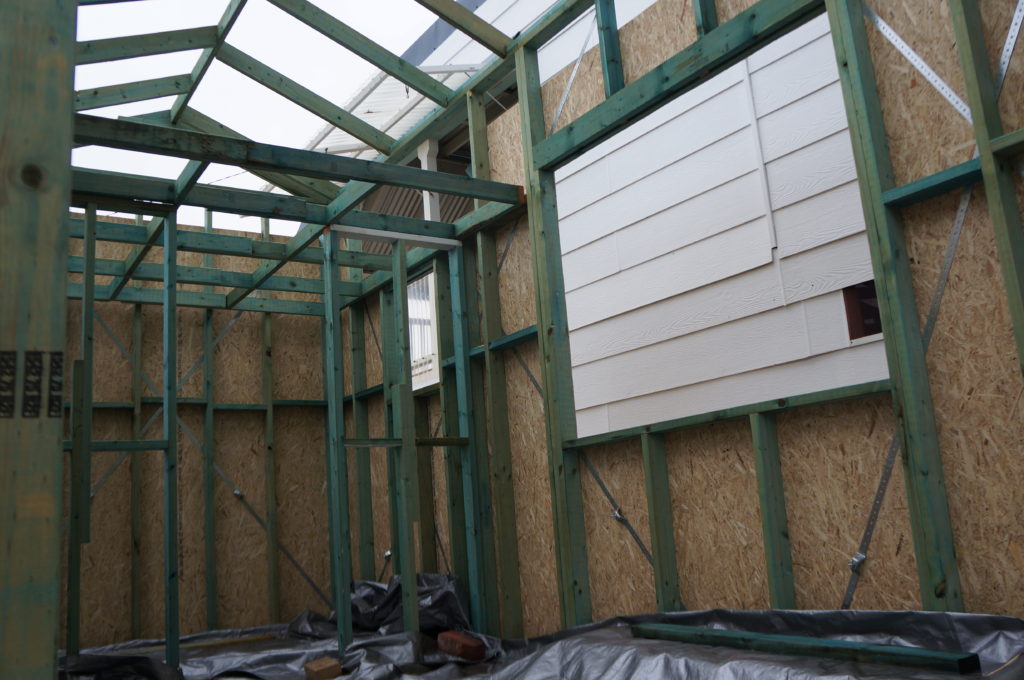
The whole idea of strapping is to create a series of crosses along all of the exterior sides of your tiny house, including the roof. Each cross generally overlaps the last very slightly as well. Like the images below.
Now to get into the work:
- Start by taking your new roll of galvanised strapping and finding the end. Take the end and place it against your framing in a corner. You can start at the top or bottom, front or back. It will work the same.
- Fix the end to the framing using your nails or screws.
- Run out the strapping to the opposite corner of that wall. So if you started at the bottom and at the front then you will run it up to the back and fix it at the top of your wall frame. If your strap at any point crosses over where a window or door is then you will need to run shorter pieces so that they start and finish before windows and door openings. Like the image above!
- Now we have a strap going in one direction we need to create our cross by installing one perpendicular to it. Again, if you run into a door or window opening then simply terminate the strap before the door or window and then start a brand new cross of strapping after the window or door
- Now repeat this process for each side making sure to overlap each cross slightly and making sure to put a cross in between each door and window.
- Once all of the walls are strapped then we need to carry out the same process on the roof. On an average tiny house 3 crosses along the length of the roof is usually sufficient but check with your drawings to see if they state otherwise. If your roof is flat/skillion then you will have 3 overlapping crosses but if you have a pitched roof then you will need to run 3 crosses down each side of the ridge.
- Once all of your strapping is installed it is time to tension it up!
- To do this grab one of the tensioners that we bought earlier and locate a position about half way along one of your pieces of strapping. Orientate the tensioner facing into the wall cavity so that it is flush on the outside for easy installation of our sheathing.
- Now slowly tighten the wing nut until it is finger tight.
- Repeat step 9 for each strap.
- Now go all over the house and give each tensioner a good tighten up. Go as tight as you can using your fingers.
Congratulations! You have just successfully strapped your tiny house and made it significantly stronger which should make sure that it stands strong for many years to come!
How To Sheath Your Tiny House
Now we have our frame completed and strapping done it is time to start sealing up the structure. This starts by sheathing the entire structure using a structural form of panel. There are two main choices of material for this job:
- 6mm Structural Plywood; or
- 6mm Oriented Strand Board (OSB)
Both materials will get the job done but OSB is quite a bit cheaper so the preferred option for most tiny housers. Once we have chosen a material it is simply a matter of calculating how many panels and nails/screws we will need and then making a trip to the local hardware store. Refer to your local hardware stores website for info on the product that you are going to use for this when calculating how many sheets your will need.
Keep in mind that not all materials come in exactly the same sheet sizes. For example, OSB comes in various sizes but the largest being a sheet of 2745 x 1200. Plywood also comes in various sizes but the largest being 2440 x 1220. The difference in length of 305mm between the two doesn’t sound like a lot but it can save you from buying half a dozen sheets which adds up pretty quickly at more than $20 per sheet.
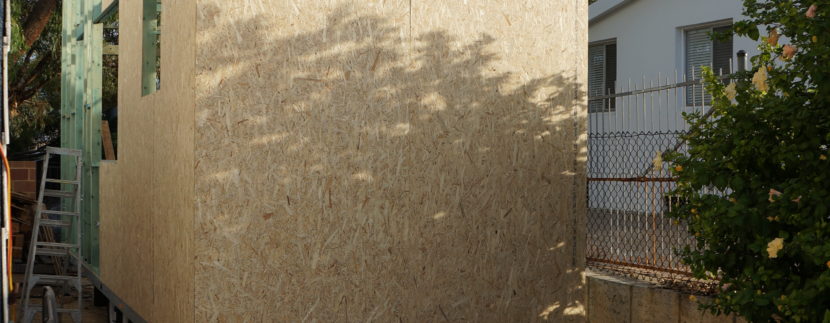
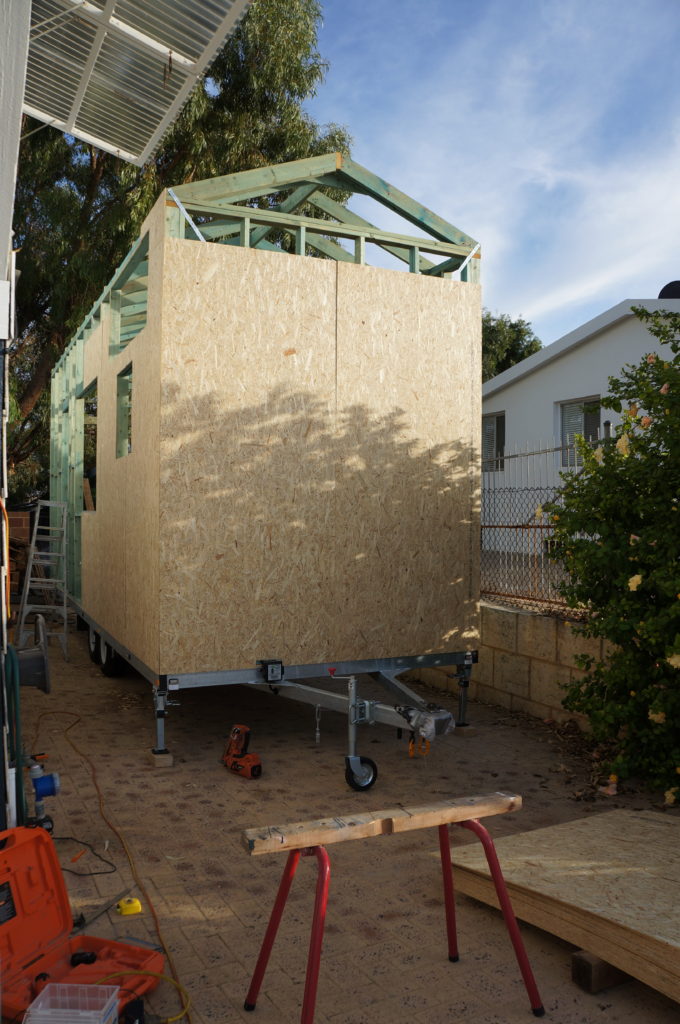
Have a look at the height of your walls and see how this is going to work with either of the sheets. In tiny house builds I have been involved with I have seen walls at around 3 metres high where we used the 2745 x 1200 sheets of OSB standing tall and stacked side by side. We then cut thin strips to fill in the remaining 255mm gap along the tops of the walls. By working out how you will stack them it will help you to calculate how many you will need. Below is sheathing using OSB sheets at 2745 x 1200.
Once you are happy with what you will need make a trip to the hardware store and grap your materials and then we can get stuck into the work! To make life easy grab yourself a buddy to complete this job as the size of the sheets makes it very awkward to do by yourself and not much fun.
- Starting at the front of your tiny house place your first sheet against the wall and align it at the bottom with the top of the trailer frame and also make sure that the side edge is flush with your framing. When you are happy nail or screw it in place using a couple of fixings.
- Then stand back and double check to make sure it is aligned. If it is then install the remaining fixings at approximately 600mm centres. Refer to your drawing to see if fixing specifications differ to this figure. If they do follow your drawings.
- Now butt up the next sheet to your first and repeat the same process as the first sheet.
- Continue with this process for the whole house.
- When you come to a window or door opening simply install the sheet as per normal over the opening. We will cut this out after installing the sheet!
- Now go inside with a drill and a large drill bit around 12mm and drill a hole in each corner of your window/door opening that you have just covered over. This will enable you to mark lines on the outside and cut it out.
- Now move back outside and using a spirit level or other straight edge mark lines between each hole that you just drilled but along the outside edge of each hole to make sure that the opening remains the same size as the opening in the framing behind it.
- Using a jigsaw, circular saw or reciprocating saw cut out the sheathing along your lines.
- Repeat this process for each sheet and opening in the tiny house.
If you are unsure whether you need sheathing or bracing then get in touch with our talented design team! Our team of architects and structural engineers will be happy to help. We can give suggestions for your unique scenario or work with you to create building plans that incorporate all of these elements so you don’t even have to think about it. Send us an email and we will get back to you with some more information. Please also leave a comment below and let me know what you thought. 🙂
P.S If you just skimmed the entire post (like I would) here’s a summary of what’s covered in the blog post above. You will learn:
– What is sheathing.
– Why you should consider sheathing your tiny house.
– What is strapping.
– Why you should consider strapping your tiny house.
– How to install sheathing and strapping on your tiny house with step by step instructions.


Tania
on said
Hi,
Just in the research stage at the moment. I have noticed that the framing for tiny houses is generally wood. Is there an advantage to this over using steel/aluminium framing?
Thanks
Tania
Adam Simmonds
on said
Hi Tania, that’s a great question! Most people choose to use timber because it is a lot cheaper to buy and is also readily available from Bunnings. It is also easy to work with compared with steel which requires more specialist tools and more experience to work with it easily. I have written about this in another blog post titled: ‘How To Build A Tiny House Using Timber‘ which covers which materials to use in more detail. You can check it out here! Thanks for the question 🙂
Tania
on said
Thanks for the reply Adam and pointing me in the right direction 🙂
Adam Simmonds
on said
No problem. Glad I could help!
Catherine Traynor
on said
Is it possible to place a ‘Tiny’ house in a cyclone area permanently. I live in Cairns.
Adam Simmonds
on said
Hi Catherine, yes it is definitely possible to live in a tiny house in a cyclone region. There are certain design elements that need to be incorporated into the design in order to meet the wind classifications of your area. Our design team are experts at this so if you need a hand with design and structural engineering send an email to [email protected] and I would be happy to give you a quote.
harry
on said
hi my house is on main road. can i get a tiny house with insulation to keep it quite on the road? what should go in to insulate noise?
Adam Simmonds
on said
Hi Harry, that’s a great question. There are two common types of insulation typically used in houses and tiny houses. They are thermal insulation and sound insulation. Thermal insulation is what is used in most houses especially new houses being built. As you may be aware it comes in a range of shapes and sizes such as batts or on a roll which can be cut to size and placed in the wall cavity.
In your case it sounds like you are more in need of sound insulation from the road noise. Achieving some sort of noise reduction should be relatively easy by using a good sound insulating product. There are loads on the market and like thermal insulation there are different ratings, brands and prices. Take a trip to the local bunnings and have a look around to see what’s available and maybe ask someone to explain things for you if need be.
Regardless of what product you choose I would definitely use both thermal and sound insulation together as this will ensure that you are not only warm in winter and cool in summer but that you can also hear yourself think! I hope that helps. 🙂
David
on said
Hello Adam,
Hope you are well!
As you pointed out it was only recent I joined, but there is soooo much info to take in and learn. The info is great, I’ll try to get back to you after I have read it a couple a few times.
I am hoping to go wider than 2.5m and possibly only move it to my chosen location and then possibly again if and when I ever sell the THOW.
As I recall in my original email, I was wondering if you know any thing about the specs. for towing an over width THOW. (up to 3.5m, not urgent at this point in time, but something I’d like to know)
I may hear from you or somebody soon.
Regards David
Adam Simmonds
on said
Hi David,
That’s great to hear that you are finding our content helpful. There is a lot to learn!
You can definitely go wider than 2.5 metres it would just require a permit to be moved. As each state in Australia varies a little in its rules in regards to over size towing I would contact your local transport department to check with them what would be required. It’s probably also worth calling a towing company to ask them as well.
Good luck!
Carol
on said
Hi Adam
Great resource, thanks.
Any info on insulating the roof of a Tiny?
Adam Simmonds
on said
Hi Carol,
Thanks so much! The insulation you use in the roof of your tiny house will depend on the roof cavity thickness. If you use 140mm deep rafters then you can use R3.0 batts. If you use smaller 90mm rafters then you can use R2.0 batts. Batts tend to be the most common option in Australia due to their affordability and ease of use but there are of course other options.
I hope that helps!
charlie
on said
Hi,
I was thinking of using a truck cab and chassis as a tiny home, how would that affect the height restriction as the tray height of the truck is alrady about 1600mm.
Adam Simmonds
on said
Hi Charlie, you can definitely use a truck cab for the base of your tiny home but it will effect the usable height you have available. The maximum height a vehicle can be is 4.2 metres on Australian roads so you would be losing about 950mm over using a more common tiny house trailer as these are about 650mm high from the ground. This would just make it very hard to have a loft but if you are ok with not having a loft then this is an awesome option!